How to clean a motorcycle carburetor without taking it apart
Updated on | By Mohit Chauhan

Reader Disclosure
Our editorial content is reader-supported. If you click on some of our links, we may earn a small commission. Learn more here.An important part of motorcycle maintenance involves carburetor cleaning. This should be done the moment you feel that your engine is not running smoothly, after a certain number of kilometers, or at the beginning of riding season. Regular cleaning of carburetor ensures longevity of your motorcycle. Experts recommend that many problems associated with the engine performance can be solved by cleaning the carburetor regularly.
Indeed, every manufacturer builds different types of carburetors depending on the motorcycle type. However, the cleaning process is somewhat similar and rather simple. In today’s blog we will discuss about various techniques that can help you clean your motorcycle carburetor without requiring it to take it apart from the engine.
Why should you clean your motorcycle carburetor?
Whether two-stroke or four-stroke engines, single-cylinder or multi-cylinder engines, air or water-cooled units, the carburetor ensures that fuel is mixed with the air in the most ideal ratio (stoichiometric ratio). The air-fuel mixture is fed into the combustion chamber via nozzles where the explosion takes place. In order to utilize air fuel mixture completely and to generate full power, the carburetor needs to maintain an ideal A/F ratio and thus prevent the mixture from getting too lean or too rich.
However due to external factors, the vents or other vital parts of the carburetor may get clogged with impurities. This clogging usually occurs during long winter breaks as the deposits and fuel residues settle around the carburetor. If in any case, the carburetor is not cleaned of dirt, the following problems can arise:
- Difficulty in starting cold engine.
- Engine stalling.
- Frequent misfiring and sluggish response to throttle.
- Unusual engine noises.
- Visible black smoke from motorcycle exhaust.
- Engine showing symptoms of running too rich or too lean.
Causes of carburetor clogging
The main reason of carburetor clogging is impurities present in the fuel. This results in formation of carbon deposits around the jets of carburetor, which then obstructs the normal flow of fuel inside the engine. Moreover, engine oils that are not periodically changed over time may also lead to clogging. This is a common phenomenon and mostly observed with motorcycles that are stored during winters.
There are special cleaners for your carburetors that are readily available in the market. The process is simple but it is still recommended to follow our step by step guide.
How to clean the motorcycle carburetor
The carburetor allows you to mix the right proportion of fuel and air, which ensures that the fuel burns completely inside the combustion chamber. If the carburetor is clogged with dirt, the ideal A/F ratio will be distorted and there is a high possibility that your stoichiometric ratio will go above or below the recommended value of 14.7:1. This results in various problems starting with engine misfires or lag, and if left unattended, your motorcycle won’t start at all.
Suggested read: Why my motorcycle won’t start
We can have these problems checked by an expert mechanic at a service center, or alternatively, we can try to clean the carburetor ourselves without removing it from the main engine, which is much more economical option since carburetor needs to be checked on regular basis.
In order to clean the carburetor without taking it apart from your bike, you will need to follow this step by step guide.
Step 1: Wash your bike
Before you proceed with carb cleaning, it is important to wash the motorcycle thoroughly. This removes mud, sand and asphalt residues that are stuck near the engine. Depending on the motorcycle body, it is best to remove the saddle and fairings so as to ensure an effective cleaning.
Step 2: Remove air filter
Locate the air filter, which is often behind or inside the air box. Remove and clean it with filter cleaner or compressed air. Clean the sealing areas to remove any residue of sand, dirt or grease. Remove any connections or hoses. We recommend you take some photos, in order to remember the position of the various components, when you are ready to put them back in their place.
Step 3: Clean the jets
To clean a carburetor without disassembling it, we can simply use a compressed air gun which is sometimes enough if the clogging is not severe. With the help of compressed air and fuel, most of the grease and fuel residues can be removed from the jets. Once done, carefully clean the upper tray and the float as well.
Step 4: Clean the membrane
Below the carburetor you will find a thin membrane (diaphragm) with a spring, make sure you clean this area as well with the help of compressed air and fuel (petrol). Post which, you can reassemble everything and take your bike for a test ride.
Clean the motorcycle carburetor with Sea Foam
Cleaning your motorcycle carburetor with Sea Foam is quite simple. It does not require you to dismantle the carburetor from your motorcycle and can be done at home. Primarily, there are two ways to clean your carb; by mixing Sea Foam with your fuel, and, by mixing Sea Foam with your engine oil.

Let’s take a look at these methods in detail.
Method 1: Sea Foam + Fuel
In order to clean your carburetor using fuel and Sea Foam mixture you need to follow the below steps:
- Refill your fuel tank completely with the type of fuel you normally use.
- Now for every gallon of fuel, you need to add 1 ounce of Sea Foam.
- Alternatively, you can mix the fuel and Sea Foam mixture in a separate tank before pouring it in the tank.
- Once you have poured the Sea Foam, close the tank lid and shake your motorcycle for few seconds. This allows Sea Foam to completely mix with your fuel.
- Take your motorcycle for a test ride for at least an hour. You will notice a thick white smoke initially, this indicates that Sea Foam is cleaning the residues and dirt inside the carburetor.
- Allow this cycle to complete and check if the engine is optimized. You may repeat this process if required.
Method 2: Sea Foam + Engine Oil
The second way to clean your carburetor is by mixing Sea Foam with engine oil. In order to do this, you need to follow these steps:
- Remove the engine oil cap.
- Pour 1 ounce of Sea Foam directly into the oil tank with the help of funnel.
- Once done, you need to take your motorcycle for a test ride.
- Monitor the condition of oil every day, once the oil turns black you need to replace it with fresh oil.
- If you feel that the carburetor is still clogged with dirt, repeat this process once again.
Clean the carburetor using carb spray
Deposits that clog the fuel system are primarily formed due to bad quality of fuel. And even if you prefer high octane fuel, there is a high probability that it may still have some impurities, depending on the gas station. These impurities that later clog the valves and jets of the carburetor cannot be cleaned with kerosene, or any other universal cleaner. Take a note that any type of cleaner that contains oil or silicone pose an additional risk of clogging and thus are not at all ideal for carburetors.
The most convenient way to clean the carburetor is by using carb spray. While spraying, thanks to the pressure in the cylinder, they wash away dirt and carbon deposits.

However such “quick cleaning” will not remove the contamination completely and is only considered as an urgent measure.
In order to clean your carburetor with carb spray, follow the steps below.
- Turn off the engine.
- Remove the air filter and spray with products such as Gumout® carb cleaner around the carburetor, throttle and float chamber (avoid spraying on electrical connections). You will notice that the dirt begins to dissolve within few minutes.
- If the parts are still dirty, you can repeat this process.
- Now start the engine and warm it up at idle for 5-7 minutes.
- While the engine is running, spray Gumout® to both ends of the choke valve shaft, in the cavity of the carburetor, flaps, and other parts of the fuel system.
- Turn off the engine and continue to spray the cleaner for 5-10 seconds.
- Adjust the idle speed if required.
- Do not rinse or wipe the cleaner and wait for it to completely dry.
- That’s it; your carburetor is sparkling new. You can now reinstall the air filter and take your bike for a spin!
What is the cost of cleaning the carburetor?
If the carburetor does not run smoothly, if it repeatedly misfires, or frequently stalls at low speeds, there is a possibility that the air-fuel ratio is disproportionate. Possibilities of dirty air or oil filter cannot be ruled out as well.
In order to clean the parts of carburetor thoroughly, experts recommend an ultrasonic bath. After ultrasonic cleaning, the carburetor regains its original performance. However, in order to clean the carburetor completely, you may have to completely dismantle it from the engine.
A professional service centre can charge you between $80 and $200 for cleaning, this depends if the carburetor is already dismantled from the motorcycle engine or not. The method usually comprises of ultrasonic bath, which removes clogging, degreases the jets, and deoxidizes mechanical parts. If you have the necessary tools to disassemble your carburetor, the cost will be much more economical.
What can I use to clean a motorcycle carburetor?
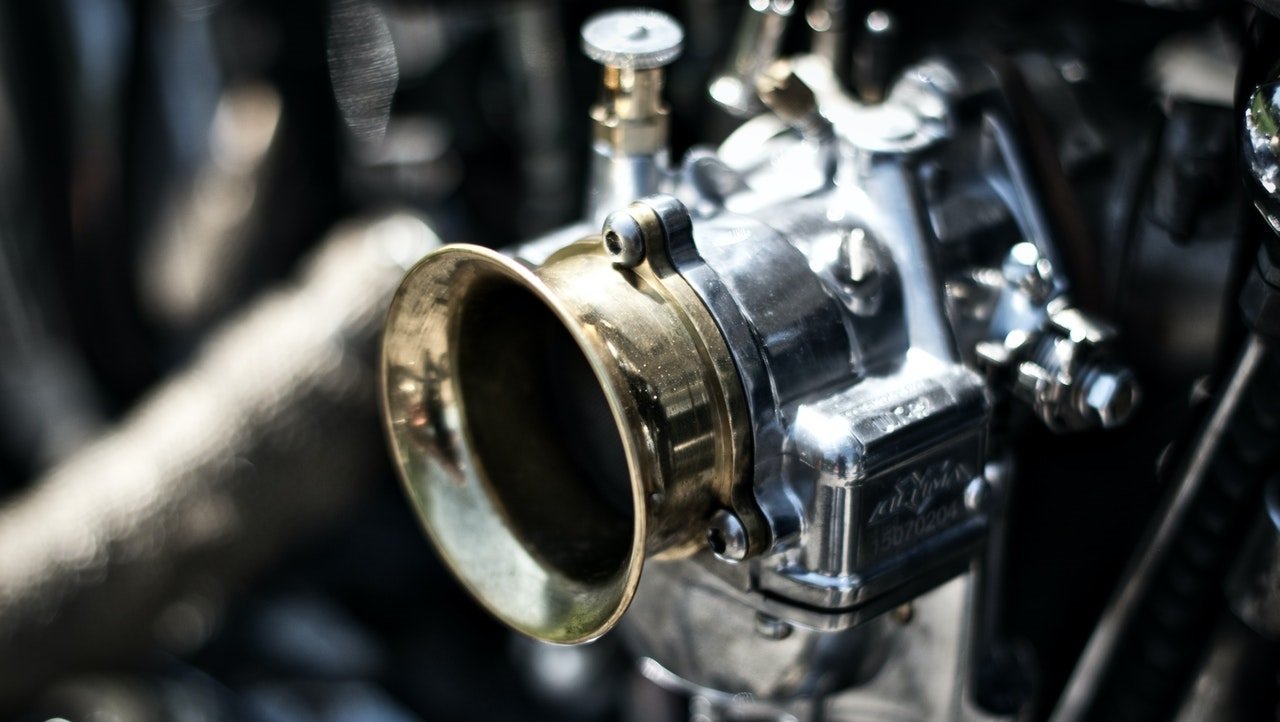
A carburetor comprises of throttle valve, strainer, venture, float chamber, mixing chamber, metering system, idling system, and transfer port. In order to clean the carburetor efficiently you can either remove it from the engine before dissembling its parts, or you can just leave everything in place and blow compressed air into the holes. If you have some experience in cleaning your motorcycle carburetor, it is best to completely remove it and clean with WD-40 Specialist Engine Degreaser.

However, there are few things to consider while purchasing a carb cleaner and among them, the most important is HEST.
HEST (High Energy Solvent Technology) is developed to clean the entire engine fuel circuit. These comprises of all the mechanical parts, from the gas tank to the combustion chamber. This technology actively supports the combustion of all types of fuel.

Impurities in fuel system can lead to many problems; rough idling, lack of fuel economy, and engine failure. If you are not sure whether a product has been formulated with HEST technology, the most effective way to find out is to read the label of the product.
Another important characteristic of a good motorcycle carburetor cleaner is its ability to dissolve various deposits that accumulate around the carburetor, such as gums, grime, and other harmful sediments. Products like Berryman B-12 chemically react with the deposits and remove them in the form of exhaust gasses.
Furthermore, the cleaner should be 100% dissolvable. It must not remain inside the carburetor for a long time. Just like carbon deposits, cleaning agents can clog the carburetor. So make sure you only opt for products that are recommended by experts.
How often do we need to clean the motorcycle carburetor?
Misfires do not always arise due to clogged carburetors. So before spending your hard earned money on its cleaning, you need to be sure the cause of malfunction.
Sometimes a dirty oil or air filter can be the reason for frequent misfires and sometimes it is not the carburetor or the filters attached to it, but faulty spark plugs that cause problems during cold starts.
If the motorcycle is used regularly, the carburetor hardly gets dirty because it is automatically kept clean by the regular flow of fuel. This being said, it is best to inspect and clean your carburetor every six months if you are using your motorcycle on a daily basis. However, if you are starting your engine after a long gap (post winter season) it is best to completely dismantle the carburetor from your motorcycle and thoroughly clean the parts before using it.
Bottom Line
We hope that we were able to address all the concerns regarding carburetor cleaning. To conclude everything we just said, here is the summary:
- Long seasonal breaks contribute to carburetor clogging. The residue and impurities settle around the engine components that may reduce the efficiency of the vehicle. Before using the bike again, you should therefore treat all the externally accessible holes and nozzles with a carburetor cleaning spray to remove dirt.
- A rusty fuel tank is amongst the primary causes of clogging in the carburetor, make sure you clean your motorcycle tank from rust that may have occurred due to corrosion.
- Degreasing the carburetor with Sea Foam or Carb Spray is a logical and efficient first aid measure in case of minor problems.
- Acidic agents attack metal and seals and must not be used when cleaning the carburetor.
- Dirty parts of the carburetor should not be cleaned with sharp tools such as files or screwdrivers, in order to avoid damaging the metal surface.
- In case of severe clogging, there are special cleaning techniques that are used by professionals; Ultrasonic baths for instance is the best way to clean a carburetor completely for any residues.
- The carburetors of multi-cylinder engines should be synchronized after cleaning and the carburetors of single-cylinder engines should be readjusted. This is important for engine performance, emissions, and fuel consumption.
- If you are planning to get your carburetor cleaned by professionals, it is wise to get multiple quotes from different service stations before you choose one.


