How to install USB charger on motorcycle

how to install USB charger on motorcycle

Reader Disclosure

Our editorial content is reader-supported. If you click on some of our links, we may earn a small commission.
Learn more here.

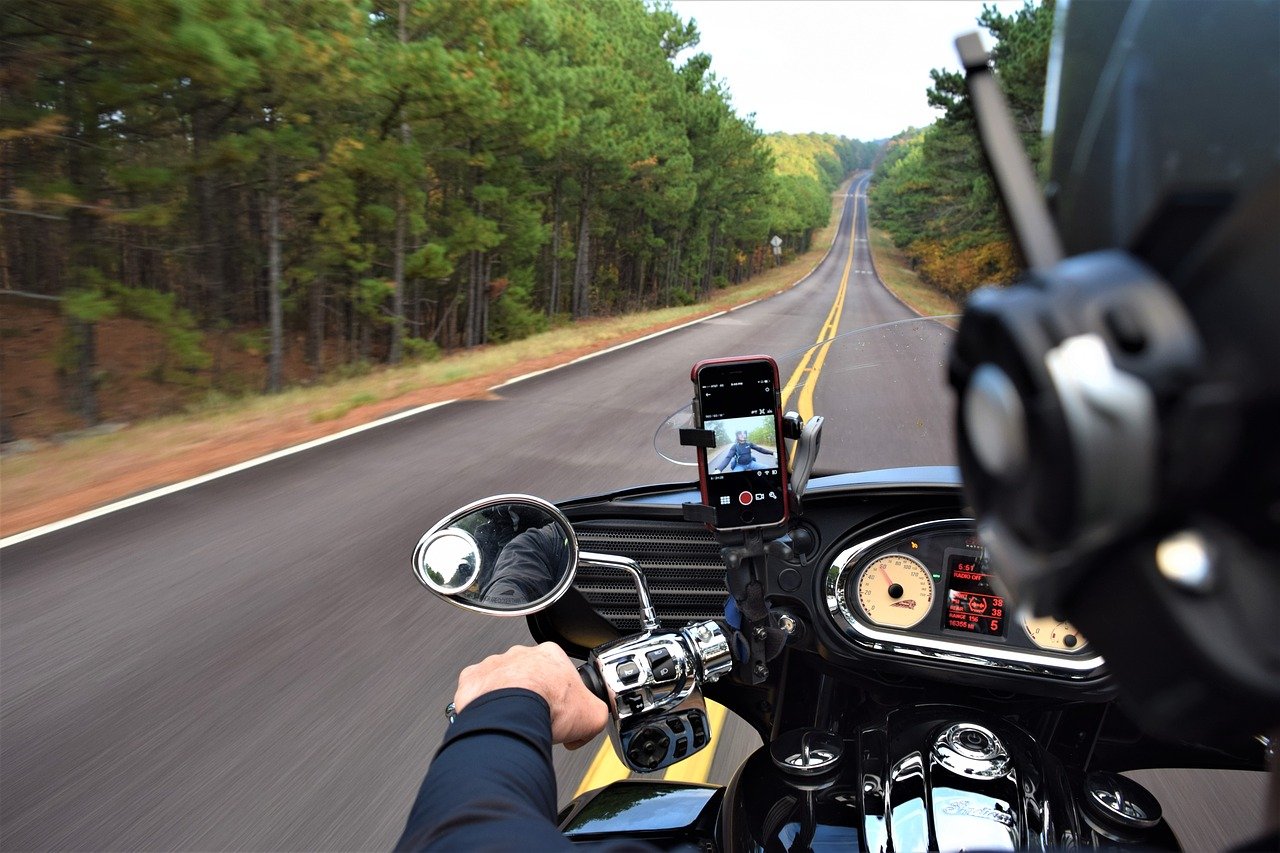
On long distance tours, many bikers use smartphones or GPS devices to navigate, but the problem is that the battery of these devices usually lasts for a maximum of 5 hours. In order to continue with your journey, you may either require recharging your device using portable chargers or use an alternate device till you reach back to your hotel.

But wouldn’t it be nice if you had a dedicated charger near your handlebar’s phone mount that keeps the device charged at all times?

USB sockets are probably the most in-demand accessories on a motorcycle and yet very few manufacturers offer them as standard. In today’s blog, we will explain how to easily install a USB socket in various ways on your motorcycle either directly from battery using switch, relay, and fuse or indirectly from ignition switch.

Installing a USB socket is easy and it is very economical. All you need is a spacious room, right set of tools, a USB socket, and an installation guide.

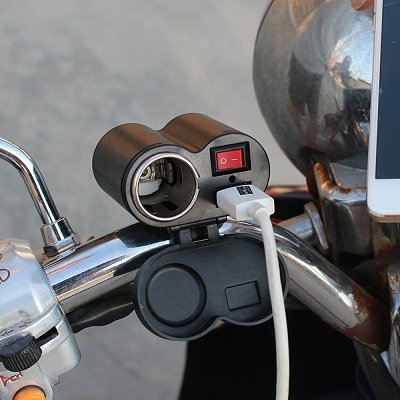
In order to install the USB socket, there are primarily two locations available; the first and the most obvious is the handlebars, but it will require you to fix the socket with an adhesive or a clamp as it might get loose due to vibrations.  The second location, which is more safe, but difficult to access, is under the saddle. This location is less prone to vibrations and the access to the battery terminals is also close.

In KTM 990 for example, we can install a standard USB socket under the saddle with a small plastic housing to put your phone. Useful for recharging a phone while riding, however much less useful if you want to have it in your field of vision and use it as a GPS!

Things you will need: In case you are planning to install the USB socket to your handlebar, you need an additional USB extension cable of almost 2 meters that can extend from under the saddle to reach the handlebars.

Motorcycle USB Port Kit

Steps to install USB socket directly from battery

  1. The connections of a USB socket are fairly easy and you generally need to attach two wires to the end of the USB terminals (black and red).
  2. Now connect the red wire to the positive and the black wire to the negative terminal of the battery.
  3. This type of installation is pretty standard and you will see that the USB charger is working fine once you have connected the wires to the battery terminals.

However, this type of installation is not recommended since the USB socket will consume the battery power all the time, even when the motorcycle is safely stored in the garage for winters.

The more ideal way to install a charger on your motorcycle would be to additionally install a switch in between the connections. This will prevent your motorcycle from draining in case you are not using the USB charger.

You may have noticed that horn and indicators do not usually switch on when you have not inserted the ignition key. This is done to protect the battery from draining out unnecessarily. We will follow the same concept and try to install the USB socket.

Steps to install USB charger without draining battery

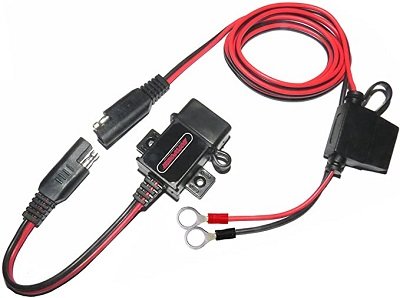
  1. Instead of connecting the terminals of the USB socket to the terminals of the battery, we will connect them to non-vital electronic parts like the license plate light, or the horn. This can be done with the help of wire connectors.
Lever wire connector

2. Connect the red wire of your USB socket to the license plate lighting cable, using a lever wire connector (click to buy), terminal block or a Wago connector (click to buy) which will serve the connections between the two wires securely.

3. If you are having trouble finding the right wire, test all the connections going at the back one by one before you arrive at the right wire. Alternatively, you can dismantle your license plate and slightly pull the wires connecting the bulbs to arrive at the conclusion.

4. Once your cables are plugged in under the saddle, all you have to do is pass them up to the handlebars. This operation depends on the motorcycle but very often it will be necessary to remove some side fairings.

5. Take a good look at the existing installation of the bike: there are probably a lot of cables going from the handlebars to the saddle; you might as well follow the same path. Do not forget to add a little slack so that the turning of the handlebars does not force the cable.

6. In order have a more secure connection (although it is not necessary), you can further install a relay switch between the connections. This will allow you to isolate your connection in the event of an electrical failure.

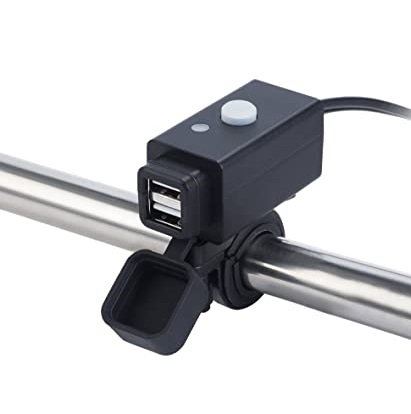
7. Finally, once the wiring is completed it is time to clamp your USB socket to the dashboard using an adhesive. Make extra sure that the socket is firmly attached or it might detach itself during vibrations.

8. That’s it; you have installed the USB charger on your motorcycle. Enjoy!

USB Charger with switch and cigarette lighter

Alternative method

There is an additional socket (with a dedicated fuse) that usually comes as a standard in case the rider wishes to install heated grips. This socket will be free in case you have not installed any heated grips and can be used as a port to connect your USB charger. The method is much simpler than the previous one since we do not need to connect from the battery. Moreover, the socket is located close to the handlebars and is more secure due to the presence of a dedicated fuse.

Does USB charger drain motorcycle battery?

The USB charger serves as an electrical point to charge your electronic devices. Often times, many riders install a USB charger on their motorcycle and do not install a connection breaker or a switch in between the terminals of battery and USB charger. So in cases like these, there is a high possibility that the active connection will continue to drain out the power from your main battery even when you are not charging your device. This drain is slow and it might take weeks for the battery to get completely discharged, but the possibility of battery drain cannot be ruled out. In short, a direct connection from motorcycle battery to the USB socket can drain the power from the battery. To avoid this, make sure you have installed a switch to break the circuit when the charger is not in use.

Installing USB Charger with switch on motorcycle handlebar

USB Charger with integrated switch

The simplest way to install a USB charger without draining your motorcycle battery is by placing a switch in between. However, it might be a little difficult for riders who are not tech savvy. So in this case, the best possible solution is to purchase a USB charger that already has a disconnect switch.

This switch is designed to turn off the power while not in use to avoid draining the battery and have some advantages over the standard USB sockets; firstly, you do not need to purchase an additional switch to fix it near the charging point, secondly, the complete charging unit looks aesthetically more pleasing since the switch and charging point are integrated together.

The installation is also pretty basic:

  1. Remove the terminals of the battery (negative terminal should be removed first).
  2. Connect the red wire of the USB charger to the positive terminal of the battery.
  3. Connect the black wire of the USB charger to the negative terminal of the battery.
  4. Clamp the wires with ‘cable tie’ together with other wires that are extending towards handlebar.
  5. Once the wires of the charger are visible near the handle bar, affix them tightly beneath the dashboard with the help of clamp and adhesive.
  6. Fix the USB charger on the handlebar. You can use adhesive or clamps for a strong hold.
  7. Switch “ON” the USB charger.
  8. You have now installed the USB charger on your motorcycle handle bar. Don’t forget to switch it off when not in use.

Note: It is recommended to purchase a USB charger that has a pre fitted fuse. In case of any electrical failure, your USB charger won’t damage other vital electrical components of your motorcycle.